Step 1: Create a new Next.js project
To create a new Next.js project, you can use the create-next-app command. Open your command line interface and run the following command:
npx create-next-app
This will create a new Next.js project in a directory named after your project.
Step 2: Install Sanity Studio
Now, let’s set up Sanity Studio, the content editing environment for your project. In your command line interface, navigate to the root directory of your Next.js project and run the following command:
npm create sanity@latest — –template clean –create-project “Sanity Project” –dataset production
This command will guide you through the setup process. Here’s what each question means:
- Create an account: Select a login provider from the list of options and confirm with Enter. This will open a browser window for you to create a Sanity account. Once you’ve created the account, come back to the command line window.
- Would you like to add configuration files for a Sanity project in this Next.js folder? Answer: Yes
- Would you like an embedded Sanity Studio? Answer: Yes
- Would you like to use the Next.js app directory for routes? Answer: Yes
- What route do you want to use for the Studio? Answer: /studio
- Select project template to use: Answer: Clean project with no predefined schemas
- Would you like to add the project ID and dataset to your .env file? Answer: Yes
Wait for the installation process to complete. Once you see a “Success!” message, you can move on to the next step.
Step 3: Run the Studio locally
To run Sanity Studio locally, navigate to the root directory of your Next.js project in the command line and run the following command:
npm run dev
This command will start your Next.js project. Once the build is complete, open your web browser and visit http://localhost:3000/studio.
You may see a message asking you to add the URL as a CORS origin. Click on “Continue” to proceed to the Sanity management dashboard. From there, you’ll need to add the CORS origin. Follow the instructions provided to add the necessary configuration
That’s it! You’ve successfully created a new Next.js project and installed Sanity Studio. You can now use Sanity Studio to manage your content in the project.
Creating and Publishing Blog Posts with Sanity Studio: A Step-by-Step Guide
Step 1: Define a new document type for your blog post
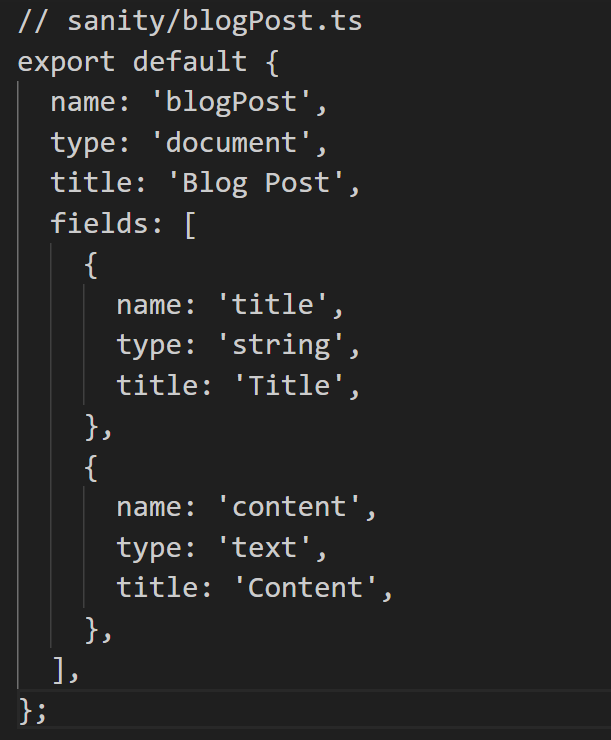
Open the /sanity folder in your project and create a new file called blogPost.ts. This file will contain the schema definition for your blog post document type. Add the following code to blogPost.ts:

This defines a document type named “blogPost” with two fields: “title” and “content”.
Step 2: Import the document type definition
Open sanity/schema.ts and import the blogPost document type definition at the top of the file. Then, add it to the types array. Your schema.ts file should look like this:

Step 3: Run the local development server
If you haven’t already, start the local development server by running the command npm run dev in your command line.
Step 4: Access Sanity Studio
Open your browser and go to http://localhost:3000/studio to access the Sanity Studio interface.
Step 5: Create a new blog post
In the Sanity Studio interface, you should now see a “Blog Post” section in the sidebar. Click on the “+” button to create a new blog post.
Fill in the title and content fields with the desired information for your blog post.
Step 6: Publish the blog post
Once you have finished writing your blog post, click on the “Publish” button to save and publish the content.
Congratulations! You have now created and published a blog post using Sanity Studio. You can continue creating additional blog posts using the same process.
Remember to customize and extend the schema and document types as per your specific requirements for your blog.

